Email & SMS Autoresponder User Guide
Once you have completed the set up and validated the records you are ready to import your lists and send your first campaign
We have provided both video and step by step guides below to help get the most out of the app.
When you first login you will get a pop up tour guide, this provides an outline of what steps are required to set your system up
General Information
The app doesn’t allow you to move to the next step in any process unless all of the required information is provided, if you try to save and move on you will see the missing fields are shaded in red
Another useful feature is when you click on box or field, you will see a hover box appear with a basic explanation of what is required
You will see the fields in each template have information entered to show you what you should be adding in each field
We will go through each stage now to set up your lists and campaigns and finish with a walk through of the reporting suite
Getting Started
Video 1
Creating your First list and opt in form
Video 2
How to edit a "done for you" opt-in form
Video 3
Creating a campaign and sending an email
Video 4
Creating an autoresponder series
Video 5
Creating a segment and sending a campaign
Video 6
Understanding the reporting functions
Step by Step Guide
Create your first list
Click Lists and lists from the drop down
Click “Create new”

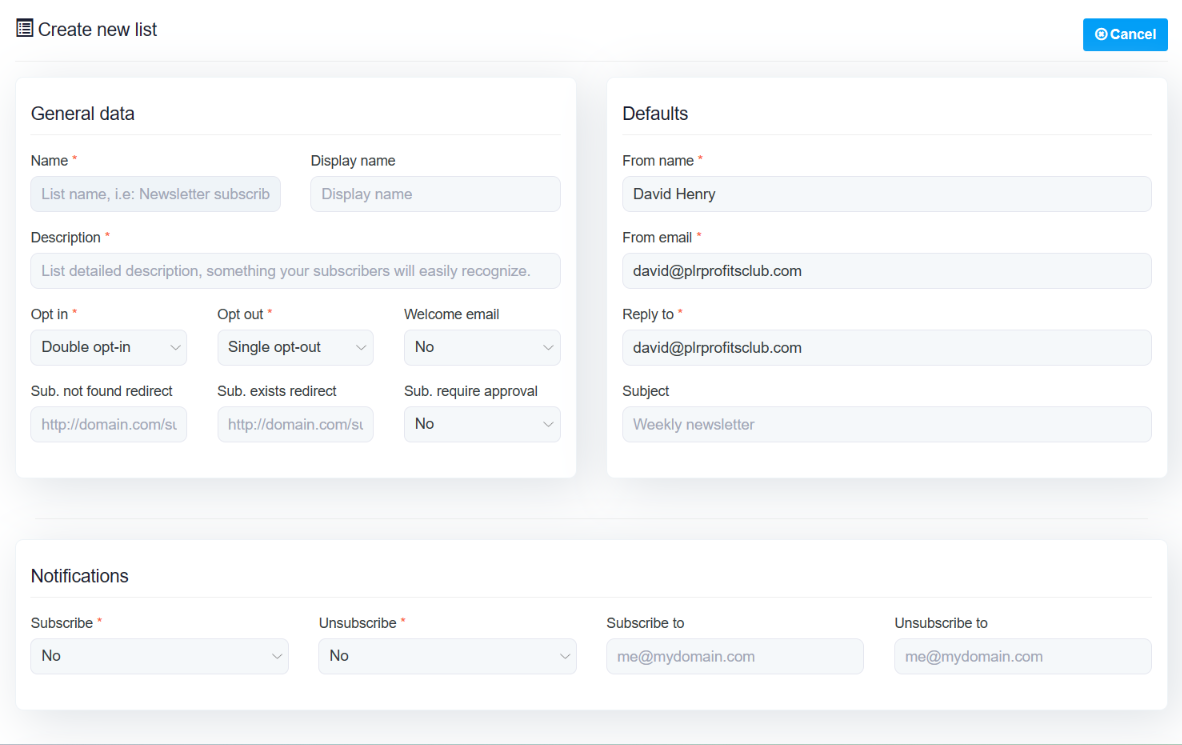
Enter the general data required
Make sure the from email and reply email are correct, it will be defaulted to the email you used to sign up but don’t worry if you don’t have the email you want to use, this can be added later
Single/Double opt in
Select which you want this list to use, single opt in doesn’t send a confirmation email, double opt in does and requires your subscriber to confirm before being added to your list
Subject can be newsletter and this is added to each campaign
Notifications can be sent to inform you of a new subscriber and an unsubscribe and you can select to activate this or once you have more than 1 list you can set various actions
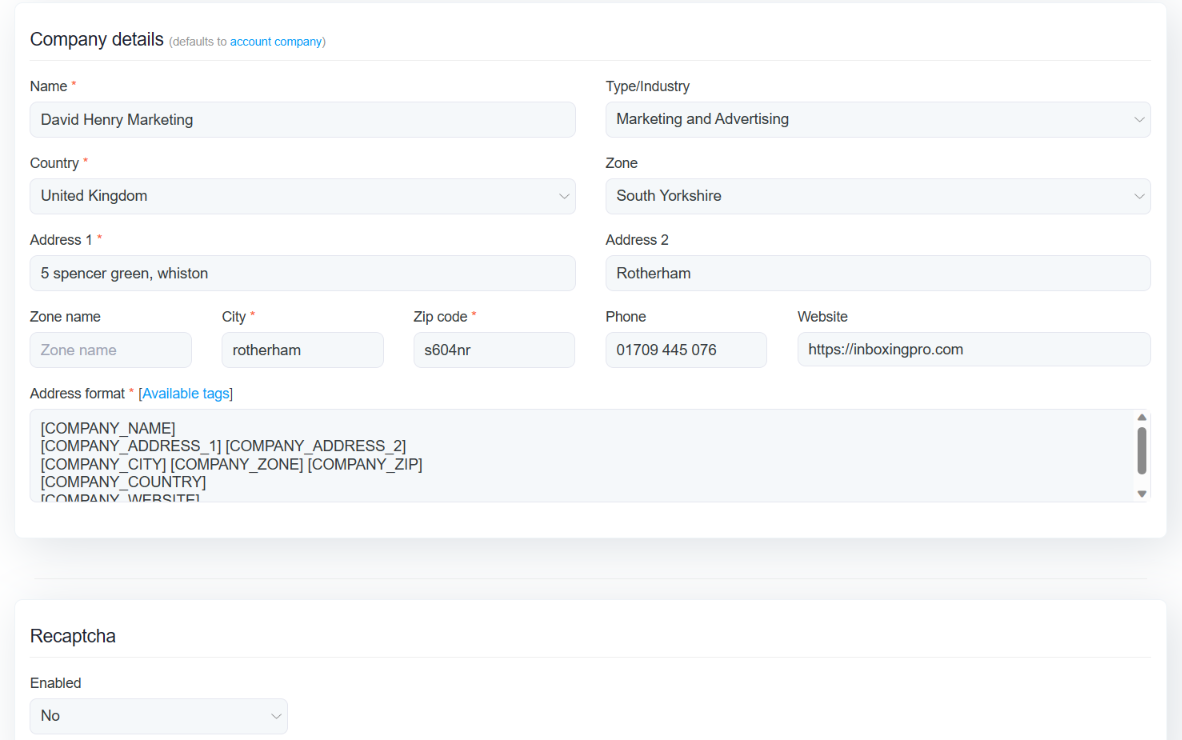
Company Details
These details are pulled through from the account profile you created when you first got access to the app. If you want this list to be sent from a different sender or company you can simply add the new details here
Click save and the list has been created
Adding Subscribers
You can manually add subscribers or you can import a list
Importing Subscribers
Click on “Lists” and you will see the list you have just created
Click Tools

Click on tools
This provides the 3 options you can do inside the app, import, export and copy
Select Import tools
You now have 3 options to import your list
The most common method is CSV which is transferring a file from your PC to the app

Select CSV and select your file to import from your hard drive

Important Please Read Carefully
Please make sure the file you wish to import is in the format CSV UTF - 8 (Comma delimited)
Before you import the list open it in excel and save the file using the extension above
If you do not have this option you can easily convert your file using either of the 2 methods below
Convert your CSV to UTF - 8
UTF-8 is an encoding set that can contain any unicode character, yet it is as compact as ASCII. For this reason, UTF-8 is appropriate for writing code for cross-platform software.
Many people use UTF-8 encoding to send and receive email in various languages.
Unfortunately, not all applications can encode files in UTF-8 by default, and Microsoft Excel is one of them. Instead of unicode, Excel encodes CSV files using ANSI.
To get around this, you need to change Excel's default character set. If you don't have Excel installed, you may use Notepad to create a UTF-8 version of your file.
Using Notepad
Click "Start," enter "notepad" in the Search field, and press "Enter" to launch Notepad.
Click "File" and then click "Open." Click the drop-down menu beside the "File Name" field, and then choose "All Files."
Locate the CSV file that you want to convert to UTF-8. Select it and click "Open." This loads your CSV data onto Notepad.
Open the "File" menu again, and click on "Save As." Enter your preferred file name. Be sure to include the ".csv" file extension.
Click the drop-down menu beside "Save as File Type," and choose "All Files."
Go to "Encoding" and select "UTF-8" from the drop-down menu. Click "Save."
Using Microsoft Excel
Launch Microsoft Excel. Click the Microsoft Office button, and then choose "Open." Select your CSV file from the list, and click "Open."
Click the Microsoft Office button, and then click "Save As." Enter your preferred file name.
Click the drop-down menu beside "Save as File Type," and then choose "CSV (Comma delimited)."
Click the "Tools" button at the bottom of the window, and then choose "Web Options."
Go to the "Encoding" tab. Under "Save this document as," click the drop-down menu and choose "Unicode (UTF-8)." Click "OK" and then click "Save."
Tip
- Notepad may not be able to open very large files. In that case, use a more powerful text editor such as Notepad++.
Click to upload and your list will be imported directly to your list
Creating your first opt in form
From the overview screen click on custom fields, you will see we have added 3 by default and these are

First name
Last name
You will see email is required and cannot be removed but the other 2 fields are not compulsory and can be removed if not required.
If you only want to collect email you would delete the other 2 fields and click save
If you want to collect first name and email you would delete last name
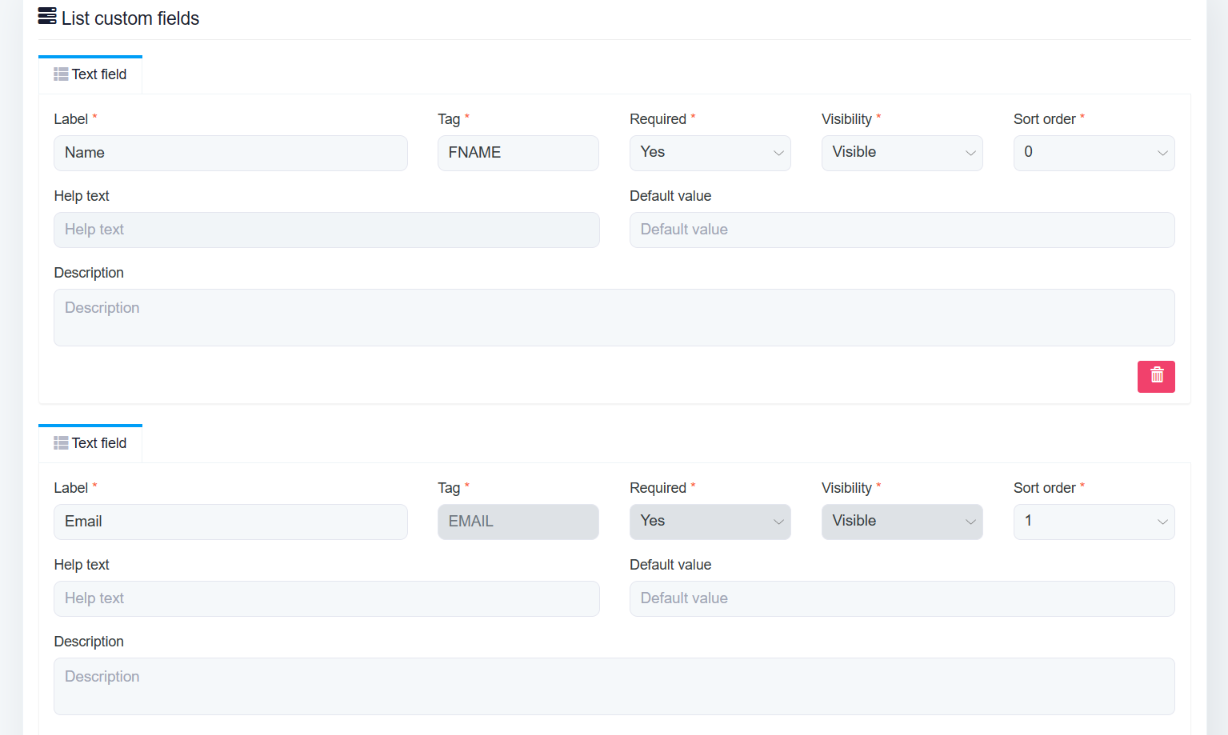
We provide a comprehensive range of additional custom fields to personalise your lead generation, simply click the link below and complete the form fields following the prompts

By default, the email field is shown as field 1, if you want to display the first name first followed by the email field you need to select the order of each field in the sort order box on the right-hand side
Click save
To get the html code to add to your landing page click on the quick links tab
Select list embed forms
Copy the whole of the code from <form action to </form>
Paste this in to your landing page and you are ready to collect subscribers
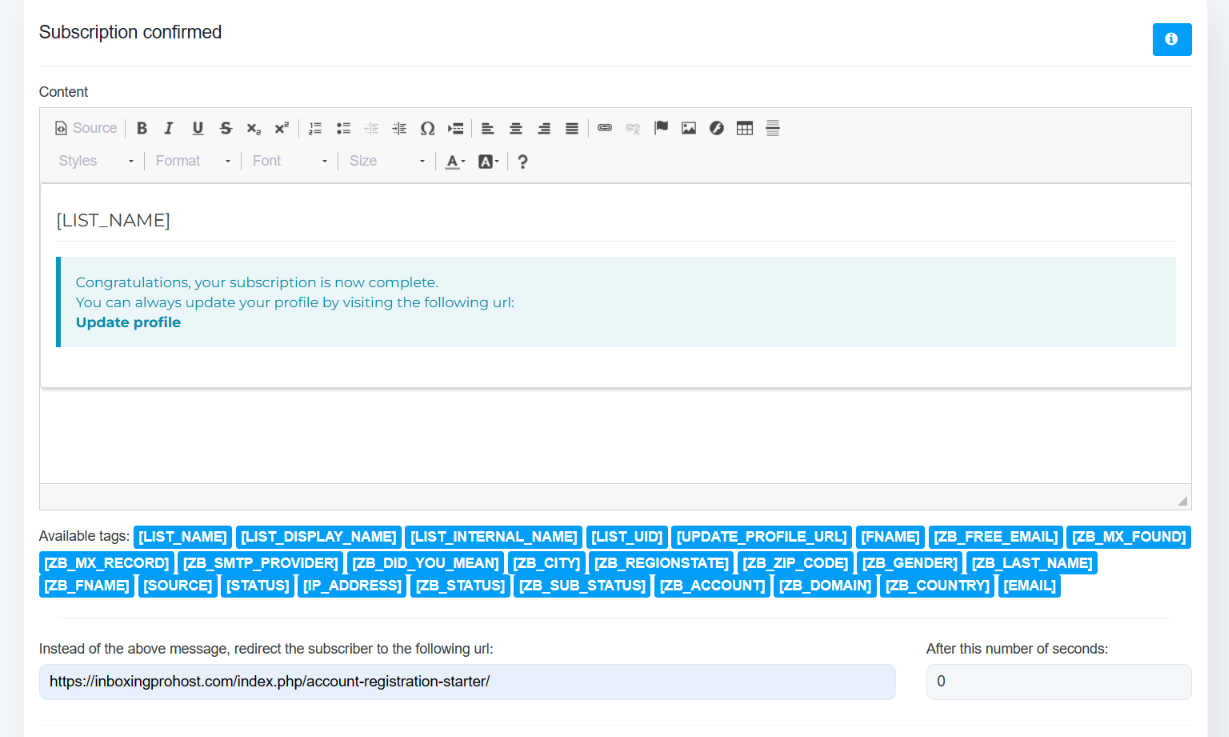
Setting up an automatic redirect from your landing page
Click on quick links
Select List pages
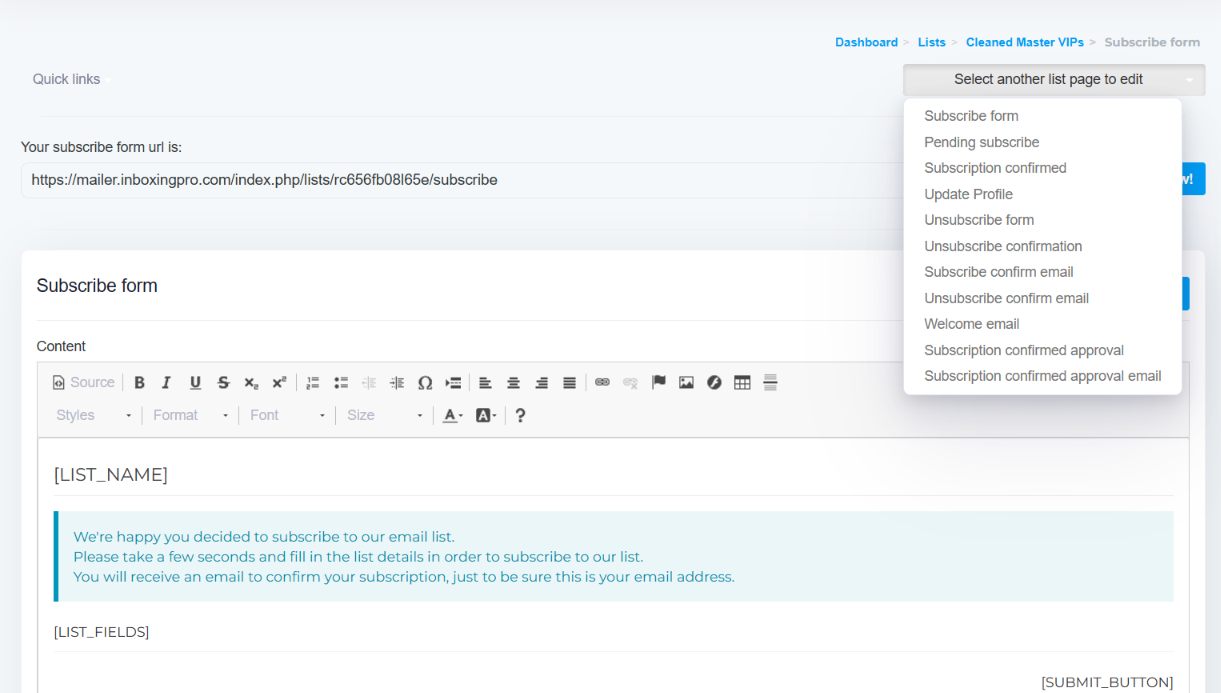
On the top right click on the link “Select another list page to edit”
Select “Subscription confirmed”
Scroll down the page and you will see a box to paste in the URL of the page you wish to redirect your subscriber too
Editing pre-loaded pages
We have provided 11 pages that are automatically sent based on certain events
You can view all of the pages from this list and make any edits you wish, click save and the pages are saved with your content.
Create targeted lists based on Opens
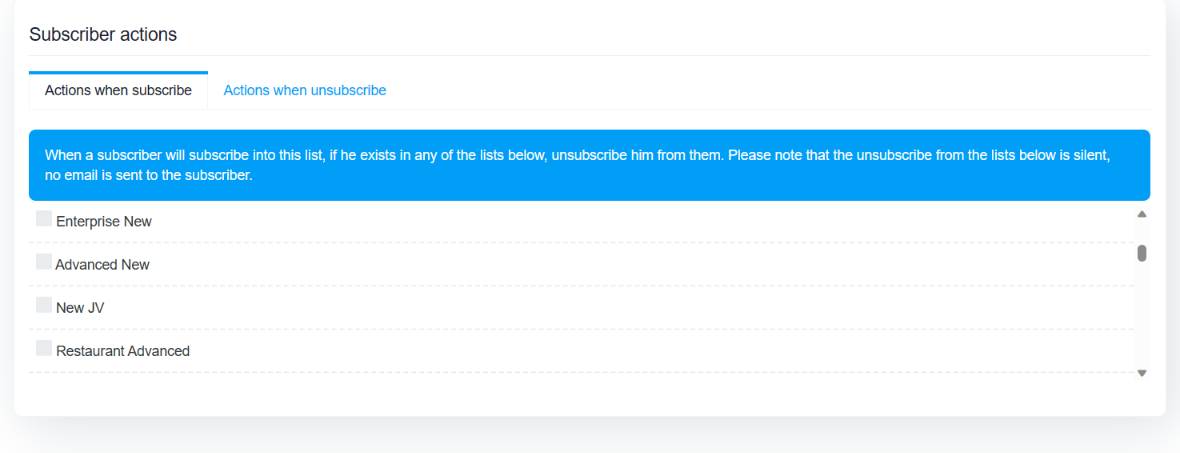
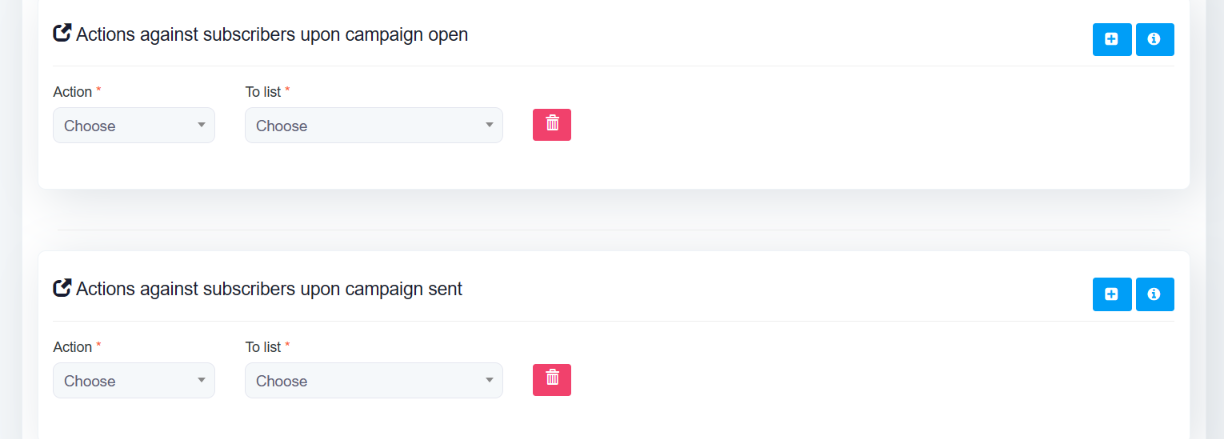
Once you have added another list you can set the subscriber actions below so if you have a prospects and buyers list you would set this here to unsubscribe from the prospects list when subscribing to this list (Buyers) for example
Creating your first campaign
Click on “create your first campaign”
Enter your campaign name

Choose the type of campaign you want to send, regular is a broadcast type message which can be sent immediately or queued to send later and autoresponder message is a follow up message to send in a sequence over a period of days or months
Select the type of message you want to send and you will set the sending details when the campaign is ready to send
Select the list you wish to send the message to and click save and exit
In the campaign set up screen you will see the fields are filled in with the default information you added in the profile section
Please make sure the “from email” and “reply to email” match the domain name you verified earlier
Add your subject
In the campaign options section, you can select the tracking options you want to collect
You can select to track emails that are opened and clicked once they are opened
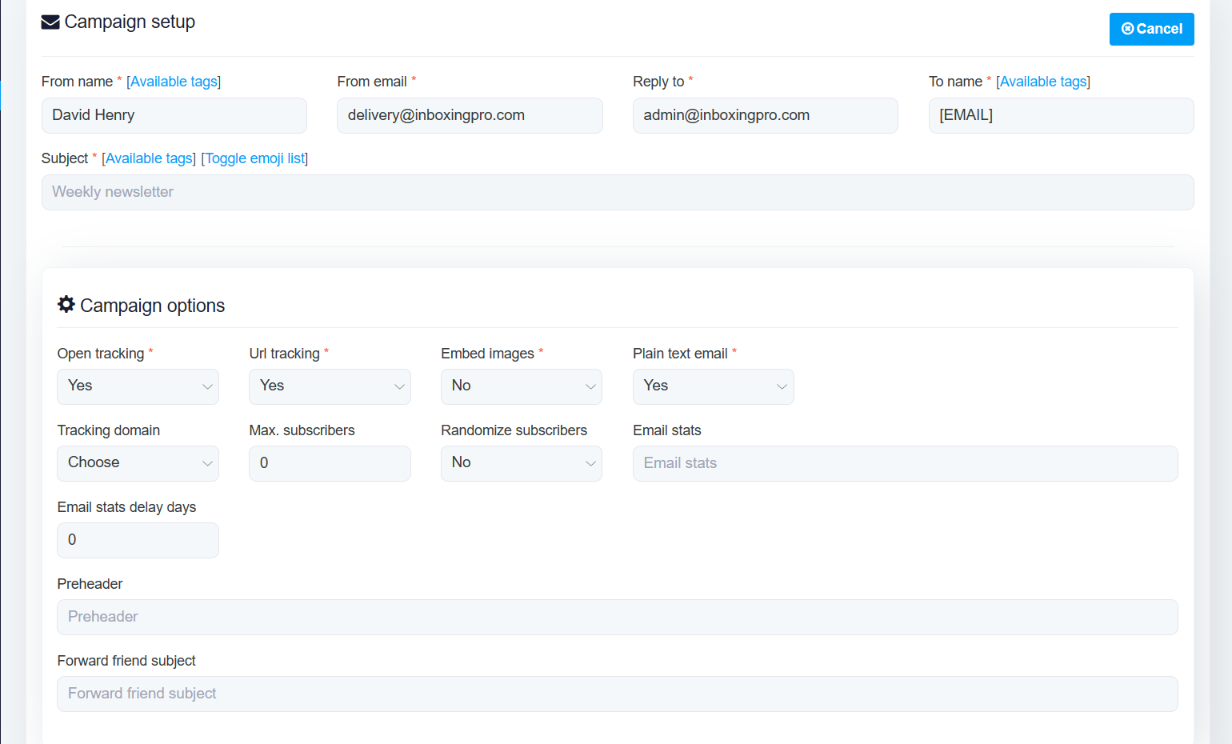
Leave the other fields as is and make sure you select the correct tracking link if you have set up more than 1 and this must match the domain name you are sending from
You can add a pre-header can be added and this is a short summary text that follows the subject line when your email is delivered in to the inbox
Many mobile, desk top and webmail clients provide this to tip you off about what’s in the email before opening it
Click show more options
Once you have created more campaigns, this is the area you can filter your lists and create segments
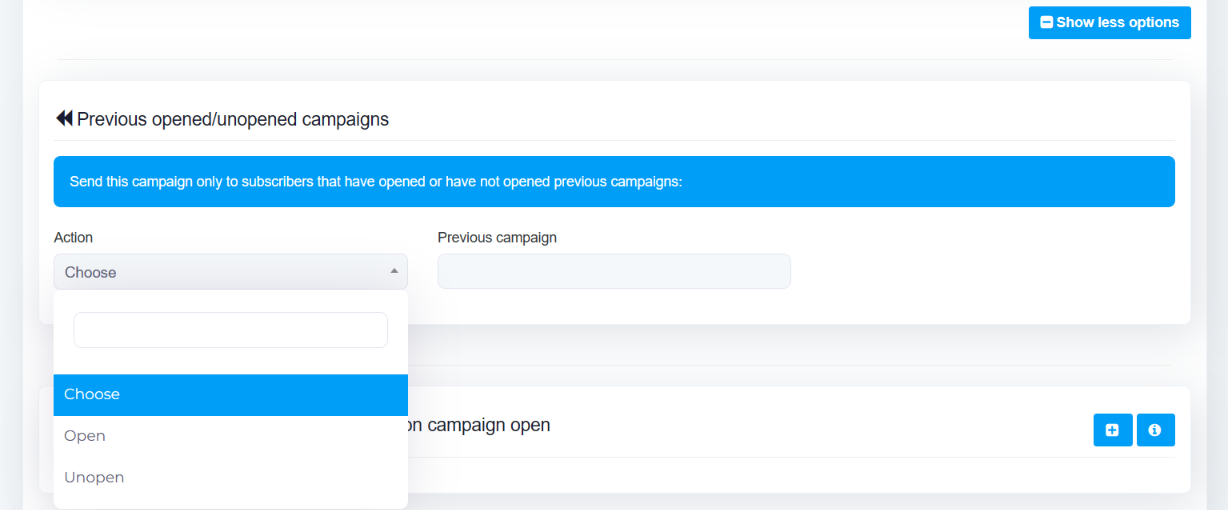
A really useful feature is the ability to send a campaign only to people who opened or clicked previous emails and also to people who didn’t
Simply select who you want to target and select the previous campaign or campaigns and your campaign will only be sent to the list selected
You can select 1 or more than 1 previous campaigns
This is especially effective to increase conversions and ROI sending your 2nd message only to the people who didn’t open the previous emails and it also keeps your subscribers happy along the way because they don’t get duplicate emails
Segment your lists based on opens and sent campaigns
Move or copy subscribers who have opened your campaigns
Select a campaign delivery server
Scroll down and view your Campaign delivery servers
Select 1 only to send the campaign or leave blank and the system will send the campaign using all the delivery servers available sending pro-rata based on the list size

At this point you will only have added 1 so tick the box to select to use this server to send your campaigns but in future you may decide to add more so it’s very important to select the correct server to work with the tracking domain and sending domain
Here is what your app will look like when you have added more servers, you can select 1 or more than 1 and the app with send to each server each hour based on the number of sends you have set as the limit in the sending server template
Once you have checked all of the fields click save and exit
Spam checker tool
We have added a link to the free spam checker tool in the app navigation
Before you send any campaigns click the link to access the FREE spam checker tool
You will see an email address, copy this and add to your test list and send the test campaign
Return to the spam tool and click "Check my score" to see the report, you will see any issues that need to be addressed before sending the campaign
Creating your newsletter
Pre-made templates
We provide done for your templates that can be edited and saved for use for future campaigns
To access, click the gallery link on the sidebar navigation, view the templates and to access click to import any or all you wish to use
You can make any edits to the text and replace images etc, make sure you always add the company tag and unsubscribe tag and save for future use
Drag n drop editor
This is the preferred tool to create templates that can be saved and used for future campaigns
To create a template, click on create new drag and drop or create new plain html
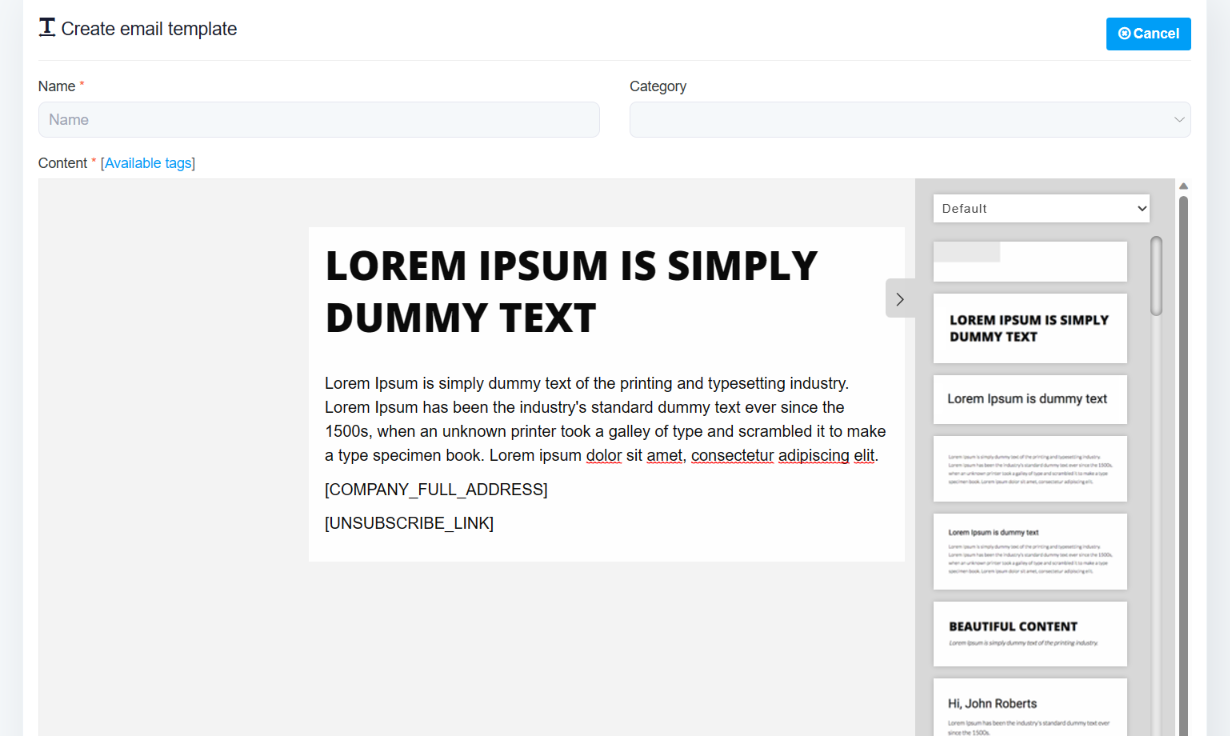
You can see the default screen of the drag and drop editor below, to create a bespoke template, simply drag elements from the sidebar to the editor as required
To add images, drag an image that is as near to the size as you want to use
Click the camera icon and select the image you want to use from your PC and select to drop if required
Custom Tags
You have a range of custom tags to add to your subject and body, click the "available tags" link top left above the editor and copy and paste a tag in place, providing the custom field has content added to your list, the text will pull through to your copy
This is used for first name, company details and unsubscribe normally
To be spam can compliant, we require each campaign to have a company tag and unsubscribe tag added to every campaign, it is not possible to save and continue unless these 2 tags have been added
Once you are happy with the template, simply name and save and you can then select this template or any other you have created clicking on change/select template
Simply copy and paste your new campaign copy and save and continue
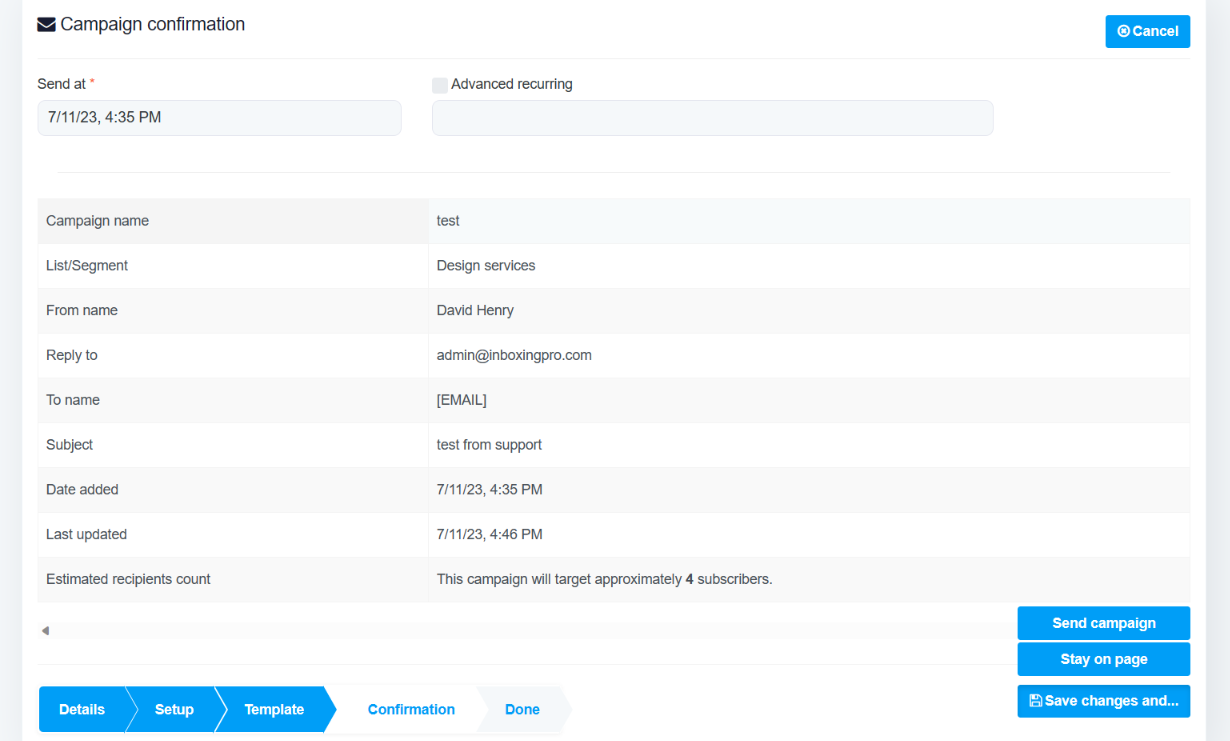
Campaign Confirmation
To set the date/time for a regular email click the date field and set the date/time to send which can be immediately or at a time in future using the calendar feature
Setting your autoresponder
This is the option to send multiple emails to the same person based on the data you add here
Generally, you will send daily or weekly emails but you do have the option to send at different periods as shown
Activate at
This is normally set immediately and this is the date/time everything is based on
Autoresponder event
This is normally set to after subscribe unless you want to include existing or imported subscribers, if you do please set this to after campaign open
Autoresponder Time value is connected to time unit
If you want to send daily emails you set the first message at 0 and this email is sent immediately after the subscriber’s opt-in
When you add the second email you will set the time value to 1 and that email is sent 1 day after
You can also set the exact time for each email to be sent if you wish
Adding further emails to the autoresponder
Make a note of the date/time you set the first email autoresponder to activate at
Create the email in the same way as the first email selecting autoresponder
When you get to the activate screen change the date/time to the original email message 1
Set the time to 1 if you want to send daily/weekly based on the time unit you choose and repeat this process for additional emails making sure to set the date and time to the original date/time
